The planner is one of our favorite awork features and unique on the market in this form. Until now, no tool has managed to bring project and resource planning in the team really clearly down to the individual calendar date.
The challenges are also anything but trivial. Bringing together short-term and long-term planning with a high level of detail in one tool, in order to finally be able to realistically assess when and where capacities are still available. Sounds complicated – because it is.
With countless use cases, the planner brings a lot of potential. However, every team has its very own planning mode. That's why we'll show you five flows for your daily work with the planner - regardless of whether you're a beginner or an expert. This way you can see what suits your team and maybe it will inspire you to try out something new.
Let's dive into 5 planner flows to get your started – or become a pro right away:
Flow 1: Finding out who on the team has capacity for a new project.
[.toc-name]Capacity for new projects[.toc-name]
Stress, high time investment and intensive capacity planning. This is exactly what the start of a new project means for most teams. Or you can make it simple and smooth - with the new planner.
Your team has won a new project - yay! But you don't know yet who will have time capacities in the coming weeks. Fortunately, this can be easily found out in the awork planner.
You start by creating a new project:
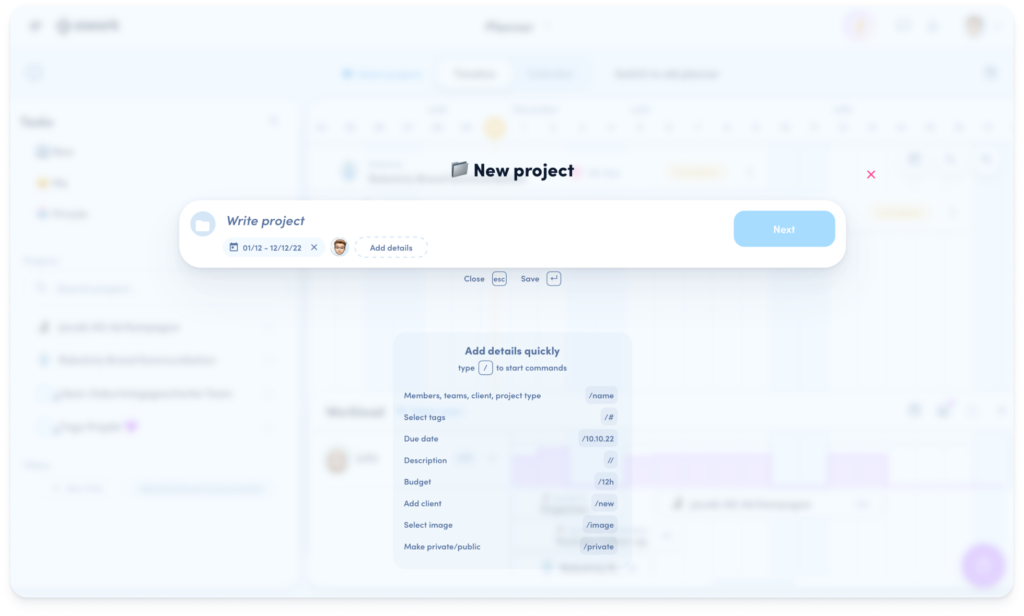
Open the workload overview and select your team:

Now you can add individual team members based on available capacity. Looks good! Still have enough team members to spare. 🎉
Pro-tip: This works great if you're building a project team with different skillsets. For example, you're looking for design expertise for your project. Open the design team in the workload overview. You can assign free members directly via the three dots.
Flow 2: Rough workload planning
[.toc-name]Rough workload planning[.toc-name]
Your team plans on a rough level, but doesn't put every little task in the timeline? With bookings, this can be easily implemented in awork. Without concrete task planning, you can still plan the capacity of your team.
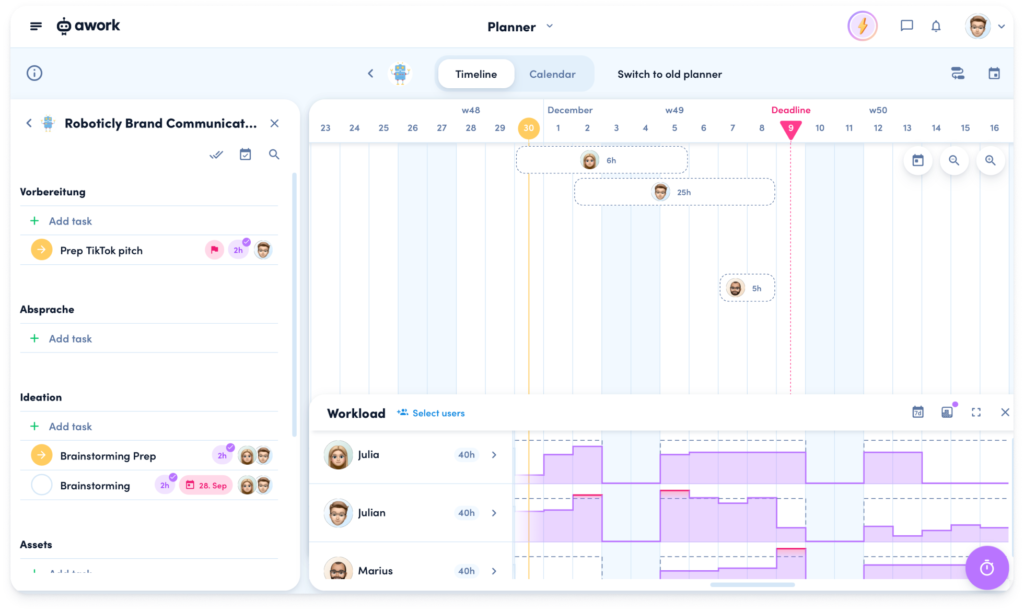
With one click you can open the timeline of your project to reserve team members for a certain period via drag-create. Simply select booking. For the rough planning of the project it helps to use milestones.
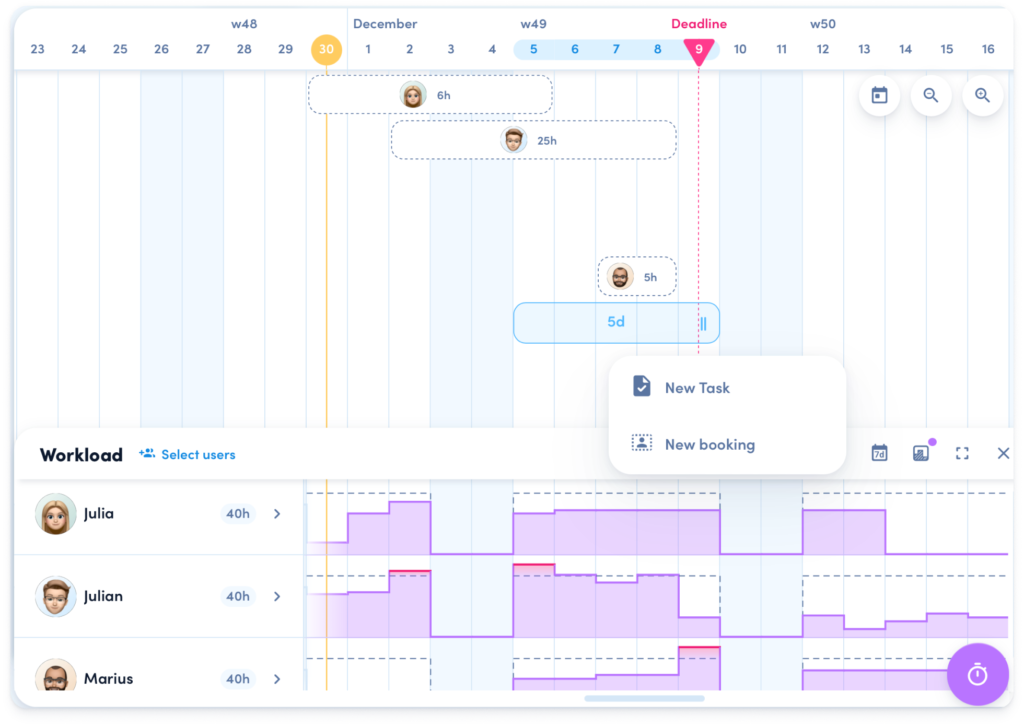
You can instantly see how your team's workload is changing - without having to create small-scale tasks.
Teams often use this type of scheduling when individual team members prefer to work in lists or the calendar. With this rough planning, you'll ensure that the capacity of relevant team members is blocked. Yay!
Flow 3: Detailed project planning
[.toc-name]Detailed planning[.toc-name]
You have already roughly planned a project a few months ago and blocked time for it. Now the start of the project is getting closer and it's time for the detailed planning of the process. Which tasks should happen when over the next few weeks? What are important milestones or intermediate goals in the project? What are the dependencies between the to-dos? The timeline is perfect for this detailed project planning.
How it works:
Of course, the timeline is also an effective tool for concrete project planning. The to-dos can be directly scheduled in the team and milestones can be entered. The clear workload display makes it immediately clear who in the team has capacities and when.
Open the project in the timeline view and the task bar on the left.
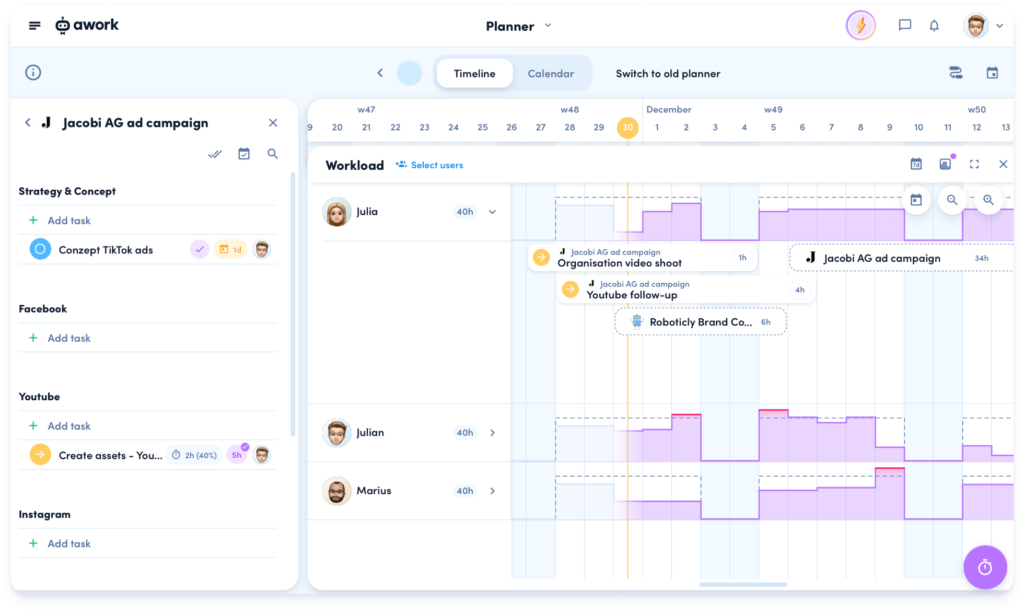
Now tasks can be dragged directly into the timeline and thus scheduled.
It's time to enter dependencies between tasks and milestones. Now just add employees with free capacities. This is how easy accurate project planning works in awork.
Flow 4: Weekly planning with the timeline
[.toc-name]Weekly planning[.toc-name]
Weekly capacity planning is essential for every team. The team meeting is often used to discuss the current projects and to get an overview. The planner with its new layout is exactly the right place for this.
For this we start in the timeline view. Maximize the workload view in the planner and open the sidebar on the left.
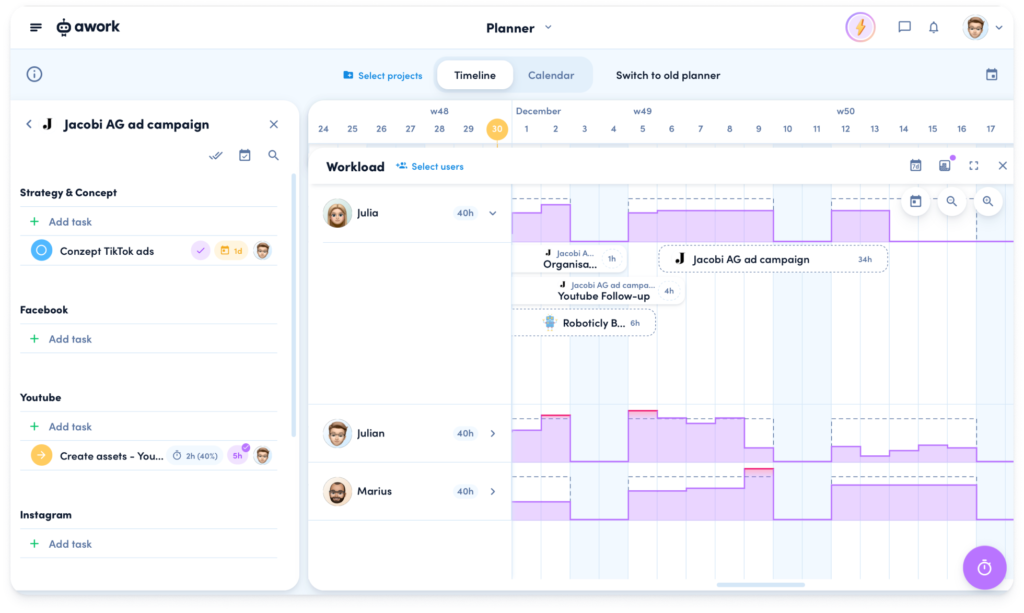
Select a project or filter of tasks you want to schedule. Now grab the tasks and assign them to members of your team. If capacity is not an issue, this step can be done without the visible workload charts. In that case you will only see who is working on what. In the timeline, you can adjust all the set elements and add more tasks and absences.
Flow 5: Daily planning with the calendar
[.toc-name]Daily planning[.toc-name]
Everyday planning often turns out to be chaotic. Meetings, already planned tasks and then spontaneous requests come up regularly. What helps? The perfect overview to keep everything in view. In the planner, this is exactly what is possible: In the calendar view, the appointments can be seen, tasks can be used as additional blockers and it is directly visible where there is still room for spontaneous requests. Even better: The team can simply take over the planning here themselves, after all, it's their calendar too.
In many use cases, project managers create the tasks and add appropriate tags. These can then be retrieved by the team. To do this, you first need to open the calendar view of the planner. There you select your team to load the calendar.

Opening the sidebar now allows you to select project or task filters. Here, the tags help each person on the team find just the right tasks. Finally, they then look at their calendar in the planner itself and organize their own day or week.
The awork planner explained in three minutes
[.toc-name]The planner in 3 minutes[.toc-name]
So, what are you waiting for? Check out these super useful planner flows right now and take your team planning to the next level!
Are you still missing the basics to get started with the planner? Then take a look at the help center. Everything is explained there in detail.
[.b-button-primary]Get started with the planner[.b-button-primary]


